• Welcome to RedcatRampageForum! Are you a Redcat fan? If so you're in luck as you've have arrived to the biggest and best RedcatRampage RC community.

    Come join our community and ask your questions, show off your Recat RCs and share your experience!

My rebuild of the problem areas... with pics!

nitrohobbiest

Member
Messages
75
Location
Upstate NY
I'm not a big fan of aluminum bumpers. I feel they should have plenty of give to them to absorb shock. Otherwise you end up with a bent bumper or damage to your truck. That said, it is best to have the bumpers supported by the chassis as much as possible. And having the front end beefed up the way my rear is going to be, wouldn't be a bad idea. The flex is less up front but not impossible.
 

Orgnoi1

Junior Member
Messages
2
Great build thread... but then I am partial as a lot of the durability build is because of the abuse it takes at my track...LOL Great post Mike...
 

nitrohobbiest

Member
Messages
75
Location
Upstate NY
Admittedly, every time this truck breaks down, its somewhere on his track. The first time I brought it there, just driving it from my truck down to the track was fine but once it crossed onto the track area, it died. Turned out the fuel lines were reversed but still!
 

nitrohobbiest

Member
Messages
75
Location
Upstate NY
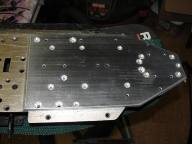
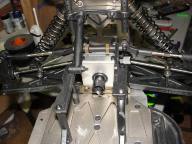
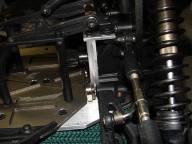
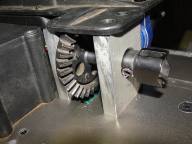
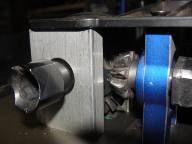
Well the rear end has been assembled and ready for installation. The chassis plate has been installed. Here are some shots of some of the partial assembly...

0023.jpg

0032.jpg

0042.jpg

I have a little prep work to do to the case before I bolt it to the chassis. Its not flat where the two halves meet. I'm thinking I may file it a bit for a flatter fit. I'm not risking debris getting inside there and wiping out my new gears. I'm thinking I may pack some white grease in there for some added lubrication.
 

nitrohobbiest

Member
Messages
75
Location
Upstate NY
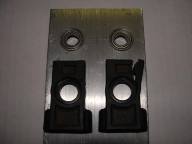
Uh oh! I discovered I have a couple more parts to make. I already got started. You'll see what I mean when you see this:

0013.jpg

Turns out the center diff gear carriers have one of the braces cracked. I'm guessing it broke when the rear diff case broke. I decided this is a part I can make so I'll save another $30+ and shipping time. The picture shows how I laid out the two new braces in some of my left over aluminum. Again, I'm doing all of this on my drill press and my miter saw. I hope to have these wrapped up soon as they are holding me up from assembling much of the truck.
 

Orgnoi1

Junior Member
Messages
2
Mike its looking real good... run day this weekend up at Bobs... get a chance to run the snot out of that WC motor....
 

nitrohobbiest

Member
Messages
75
Location
Upstate NY
Center diff mounts almost done. The next couple pics shows them installed for test fit. I found I needed to deepen the bearing depth a few clicks on the drill press again but now its smooth as silk. The mesh feels perfect and the end play is fully adjustable with shims. Now to drill and tap the top holes and start putting this beast back together. I'm choosing to not do much by the way of finishing the parts. This truck was never meant to be extra pretty. I just want to run it hard and hope I nailed a bunch of the problem areas.

0014.jpg

0024.jpg
 
G

Guest

Guest
Nice. It's looking really tough.
 

nitrohobbiest

Member
Messages
75
Location
Upstate NY
Thanks everyone. Its been many hours and late nights to do this. I've had to skip a night or two just to get some normal sleep so I hope all my efforts pay off. Of course, my basement flooded today so I spent all day tearing apart all the cars and parts that I had on the floor and drying them and storing them in bags of rice. I had a couple cars completely submerged so servos, motors, and escs all got stripped, blown dry and bagged with rice. I have my fingers crossed that I did enough to save them. I even had some of my power tools under water, all the ones I used for this build of course. drill press is good to go and that's all I need at this point.
 

Deluge

Senior Member
Messages
7,900
Location
Tucson, Arizona
Bummer. I've rescued a few wet servos and an ESC. Just took them apart, dunked them in some isopropyl alcohol and set them to dry.
 

nitrohobbiest

Member
Messages
75
Location
Upstate NY
Good idea Deluge. I hadn't thought of that but it must speed up the dry time for sure.

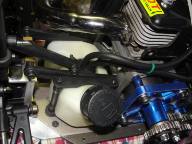
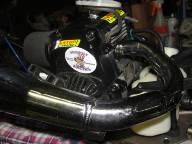
Finally I'm done creating parts and I'm now putting this thing back together. I spent a few extra minutes shimming the pinion to crown gear mesh. I got the teeth lined up nicely with just a click of free play. That part is in and done. I'm making sure as I put it together that every grub screw on every part has been cleaned and locktited. I also cleaned the tank and added some rtv to the fuel line grommet. That always seemed to dribble when the tank is full... very messy.

I have the rear diff case flattened on the bottom side where it meets the chassis so that's ready. It had a crown to it for some reason but I filed it flat. I'm contemplating adding some rtv to that area to keep my grease cleaner. Any thoughts? Good idea, bad?
 

nitrohobbiest

Member
Messages
75
Location
Upstate NY
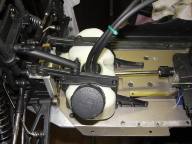
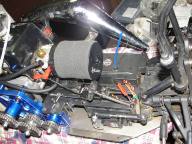
Made a huge jump in progress yesterday before dinner. My diff, tank, gear plate, and engine are back in. I made a note to replace all of the nylock nuts that hold the gears on. One of the nuts worked loose from my last run so I'm playing it safe. I also rerouted the servo linkage so I could run the HPI Baja filter. Rerouting gained me complete clearance even though I still have a Phatdad inclined stack on order. I may just save it for a future Baja purchase. All that is left is side guards, gear cover, my handmade roll cage, wheels, and setting my radio to the new linkage arrangement. I am very excited to rip this bad boy with a bit less worry. My debut run will be at the track owned by the builder of my engine, Dogpile Racing. They just dug in a new offroad track which I am excited to try out. They have a large oval which my truck could have handled before so we'll see.

0025.jpg

0033.jpg

0043.jpg

0052.jpg
 

nitrohobbiest

Member
Messages
75
Location
Upstate NY
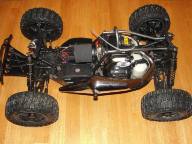
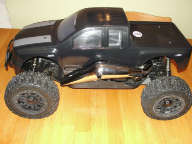
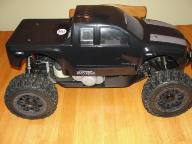
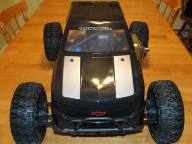
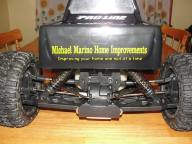
Well, I will be finding out its durability in 12 hours. Its all built and tuned. I reset my Spektrum failsafe to work with my reversed linkage setup. Old way went straight to WOT. Yikes! I realized just how bad my alignment is now that its sitting on my table for the final photo shoot. I need to look up some specs for camber settings. The rear looks way off and the front doesn't look so great either. Anyway, here is the finished product although the body I just did won't see dirt for a while. I still have the original in good shape for bashing. Let me know what ya think and thanks for following along and the many kind words.

0072.jpg

0016-1.jpg

0053.jpg
 
Last edited by a moderator:

cordy

Senior Member
Messages
2,032
Location
near chicago
Great.I love the tail gate. I should have that for my ol ," I will improve your life one nail at a time",and I use the word nail in another context,ha ha. Bravo Mike.
 

Create an account or login to comment

You must be a member in order to leave a comment

Create account

Create an account on our community. It's easy!

Log in

Already have an account? Log in here.

Members online

No members online now.

Latest posts

Top